Mfr Part # 3333
CIRCUIT PLAYGROUND EXPRESS
Adafruit Industries LLC
License: See Original Project Touch DC Motor FETs LED / Display Drivers Circuit Playground STEMMA
Guide by Erin St Blaine
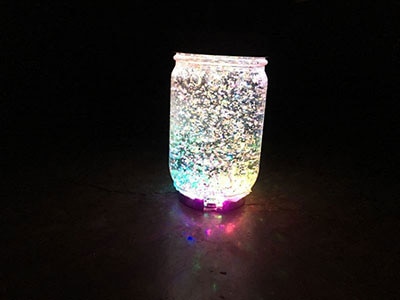
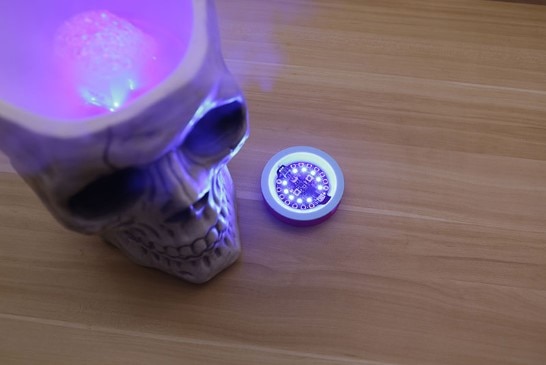
Step right up and behold Professor Bubbleton’s Breathing Head, a curious apparatus to keep your audience on the edge of their seats. A submerged head rests under theatrical LED illumination sealed inside a clear apothecary jar — until a visitor dares to tap the vessel, at which point the head responds with a sudden stream of bubbles, as though its humours have not fully departed upon beheading.
At the heart of this modern marvel is the Circuit Playground Express, whose onboard accelerometer and NeoPixel light ring make it perfectly suited for sideshow duty. A knock on the jar is detected directly by the board, triggering a timed burst from a hidden air pump while the built-in NeoPixels provide customizable lighting effects. The result is a self-contained illusion that feels uncanny and responsive, without requiring complex wiring or extra sensors.
In this guide, you’ll assemble the apparatus using readily available parts, mount the Circuit Playground Express inside the jar, and configure our simple code to coordinate the tap detection, bubble effect, and lighting. Along the way, you’ll learn how to turn a single gesture into a memorable interaction — the kind that invites onlookers to step closer, tap lightly, and immediately question whether they should have done so at all.
No actual beheading is required for this guide. Our effigy was not harmed in any way. We'll show you how to create this illusion with any head you'd like to submerge -- all you need is a few clear photographs. Or, use our example effigy for instant gratification!
Cable glands will allow you to pass the air tube into the jar.
A plexiglass apothecary jar that's head-sized - I used this one from Amazon
Photo editing software (if you want to make your own head, or use our example head)
A printer
A laminating machine and at least 2-3 laminating sheets
A drill and 1/2" drill bit (smaller bits help too)
A fake mustache to hide the air tube
Some fake hair for the head - using part of a wig works great
A soldering iron & accessories
Silicone RTV Adhesive - great for waterproof seals
Hot Glue Gun
A pin or awl for poking air holes
Some EVA foam, wood, or other material to make a base for the jar
The MOSFET will connect to the Circuit Playground Express using the STEMMA port.
Connect the STEMMA cable to the Circuit Playground Express as follows:
Black wire --> GND
White wire --> A1
Red wire --> VOUT
The air pump connects to the spring terminal on the MOSFET, connecting + to + and - to -. Look for a little red dot on the back of the pump near one of the solder terminals to tell which is which. The side with the dot is +.
The bottom of the air pump has two solder connection points. One is marked with a red dot -- this is the + side. Solder a red wire to this point and a black to the other.
Make these wires pretty long. The photo shows shorter wires, but ultimately I ended up lengthening them to around 2-3 feet, roughly the same length as my silicone tube. This pump is a bit noisy so longer wires will give you more options for hiding / quieting your pump so as not to ruin your illusion with mechanical noise.
Connect the red wire to the + terminal on the MOSFET and the black to the - terminal.
Use a screwdriver or your finger to gently press the tabs on top of the terminal. Insert about 1/4" of stripped wire and release the tab. The wire should stay connected tight when you tug on it gently.
Plug your STEMMA cable in to the MOSFET. Solder the three wires to the Circuit Playground Express as shown: Red to VOUT, black to G, and white to A1.
I kept these wires pretty short. The Circuit Playground Express and MOSFET will both be attached to the bottom of the jar, so I tried to minimize additional wire here.
That's it for the electronics! The silicone tube will attach to the opening on the top of the pump, where the air flows out. The opening on the side of the pump is the air intake, so be sure not to block this hole.
If you've never used the Circuit Playground Express with CircuitPython before, you'll need to do some setup. Plug in the Circuit Playground Express to your computer via a known good data+power USB cable.
If you see a new flash drive on your computer named CIRCUITPY, all is good.
If you don't see CIRCUITPY, then double click the little reset button in the center to put it into bootloader mode. When the on-board NeoPixels all turn green and a USB storage drive called CPLAYBOOT shows up, we'll need to load a fresh copy of CircuitPython.
You’ll need to follow the below guide to set up CircuitPython and then come back to continue.
To use the application, you need to obtain code.py with the program and the library files that make the code run.
Thankfully, this can be done in one go. In the example below, click the Download Project Bundle button below to download the necessary libraries and the code.py file in a zip file.
Connect your board to your computer via a known good data+power USB cable. The board should show up in your File Explorer/Finder (depending on your operating system) as a flash drive named CIRCUITPY.
Extract the contents of the zip file, copy the lib directory files to CIRCUITPY/lib. Copy the code.py to the CIRCUITPY drive on the Circuit Playground Express via your computer. The program should self-start.
# SPDX-FileCopyrightText: Erin St. Blaine for Adafruit Industries
#
# SPDX-License-Identifier: MIT

"""
Circuit Playground Express shake trigger.

Reads accelerometer magnitude and, when it exceeds SHAKE_THRESHOLD,
pulses pin A1 HIGH for TRIGGER_DURATION seconds, then enforces a cooldown.

Also sets a fixed NeoPixel pattern at startup.
"""

import math
import time

import board
import digitalio
from adafruit_circuitplayground.express import cpx

SHAKE_THRESHOLD = 11.0
TRIGGER_DURATION = 3.0  # seconds
COOLDOWN = 1.0  # seconds to wait after trigger
LOOP_DELAY = 0.01  # seconds


def setup_a1_output() -> digitalio.DigitalInOut:
    """Configure A1 as a digital output, default LOW."""
    a1_output = digitalio.DigitalInOut(board.A1)
    a1_output.direction = digitalio.Direction.OUTPUT
    a1_output.value = False
    return a1_output


def set_pixel_pattern() -> None:
    """Set the NeoPixel ring to a red/green pattern."""
    red = (255, 0, 0)
    green = (0, 255, 0)

    pattern = (
        red, red, red,
        green, green,
        red, red, red,
        green, green,
    )

    cpx.pixels.auto_write = False
    cpx.pixels.brightness = 0.2

    for index, color in enumerate(pattern):
        cpx.pixels[index] = color

    cpx.pixels.show()


def acceleration_magnitude() -> float:
    """Return the magnitude of the CPX acceleration vector."""
    accel_x, accel_y, accel_z = cpx.acceleration
    return math.sqrt((accel_x ** 2) + (accel_y ** 2) + (accel_z ** 2))


def main() -> None:
    """Main loop."""
    a1_pin = setup_a1_output()
    set_pixel_pattern()

    while True:
        magnitude = acceleration_magnitude()

        print(
            f"Magnitude: {magnitude:.2f} | "
            f"Threshold: {SHAKE_THRESHOLD:.2f} | "
            f"A1 value: {a1_pin.value}"
        )

        if magnitude > SHAKE_THRESHOLD:
            print(">>> SHAKE DETECTED! Pulsing A1 HIGH")
            a1_pin.value = True
            print(f"A1 is now: {a1_pin.value}")
            time.sleep(TRIGGER_DURATION)
            a1_pin.value = False
            print(f"A1 is now: {a1_pin.value}")
            time.sleep(COOLDOWN)

        time.sleep(LOOP_DELAY)


main()
The code should automatically run once you save the file. You'll see red and green lights on your Circuit Playground Express. Tap or shake your board and the air pump will blow for 3 seconds.
If you want to edit the code, Mu is a good choice for a code editor. Mu is written in Python, and works on all 3 major platforms: MacOS, Windows, and Linux (including the Raspberry Pi). It has an awesome CircuitPython mode, and has a built-in serial console, so you can easily see text output from your code too. You can follow the below instructions to install Mu:
Near the top of the code are some variables you can change to dial in the sensitivity and timing of your project.
SHAKE_THRESHOLD = 11.0
Raise this number to make the tap less sensitive or lower it to make it more sensitive
TRIGGER_DURATION = 3.0 # seconds
The length of time the air pump stays on for - change as desired
COOLDOWN = 1.0 # seconds to wait after trigger
Change this to adjust the time between triggers
To change the light colors or pattern, look for this section of code:
def set_pixel_pattern() -> None:
    """Set the NeoPixel ring to a red/green pattern."""
    red = (255, 0, 0)
    green = (0, 255, 0)

    pattern = (
        red, red, red,
        green, green,
        red, red, red,
        green, green,
    )
To use different colors, input the RGB values (here's a handy color calculator) of the color you want and insert the color into the pattern list.
These directions are based on an Instructible tutorial by mikeasaurus showing how to turn a front view and a profile view of a head into a wrap-around 3-d image.
The file I made can be downloaded below by clicking the green button:
I used Adobe Photoshop to create the image, but it's also possible to use Inkscape or another free image editing software if you don't have Photoshop. The .zip file above includes my source images (a front and profile image), the final image, and a layered .psd file which you can edit or use as a template for creating your own head image.
Take a photo of your subject from the front and from the side, using bright even light. It works best if the photos are taken in the same environment.
I asked my subject to make a face as though he was blowing bubbles for extra realism.
Open both photos in your photo editing software.
Crop and resize the images so they'll fit in your jar. The image height should be about 1/2" shorter than the height of the jar's viewing area. My final image ended up at 6" tall and 11" wide after cropping and resizing. Your height will vary depending on your jar size, but 11" wide is a good starting point since that's about what will fit on a sheet of standard printer paper.
Copy and paste the two images into the same file and align them so the eyes overlap with the profile image on top.
In Photoshop, make a layer mask on the profile layer and use the gradient tool to make the layer blend slowly into transparency, revealing the straight-on photo underneath.
Adjust the size and position as necessary so the corner of the profile eye aligns with the corner of the front-facing eye.
Unlink the layer mask from the layer to move or adjust the transparency area, without moving the image.
Once you're happy with the alignment, copy the profile layer and mirror it to create the other side of the head.
I used the rubber stamp tool to fill in any gaps in the chin or hair line.
Print out the image and roll it into a cylinder to see if the illusion works. Mine took 2-3 iterations before I was happy with the layout and size.
Do a test fit in your jar to see how it looks.
Trim the edges of the image and round the corners if desired to make it fit in the jar better. My jar has curved edges so this helped the image lay a little better in there.
Cut a 1/4" hole in the paper for the air bubbles to come through. Make this hole bigger than you think you need. We need a good amount of sealed laminate here -- if we poke holes through paper we'll get leaks, so this hole is necessary to give us a sealed bit of plastic between the lips so no water can get in.
Laminate the paper making sure there's a good 1/4" of sealed plastic on all edges.
Trim the laminate and use a pin to poke a few holes in the mouth area, making sure not to puncture the paper. The water seal requires plastic-on-plastic to stay water tight.
Test the fit. If all looks good, laminate it a second time just for good measure. Poke your pin holes in the mouth and trim the edges, making sure to leave about 1/4 of sealed plastic all the way around.
I didn't seal it well enough the first time -- the second photo is the result.
To cover up the big hole required for sealing, and for extra fun, I added a fake moustache. Glue this on with RTV silicone sealant so it stays on underwater.
The jar I used looks like glass but it's actually plexiglass, which means we can drill a hole for our air tube.
Drill a 1/2" hole for the cable gland. This is easiest if you start with a smaller pilot hole -- the plastic is less likely to crack if you come at it gently.
I originally drilled two holes as I had a different prototype idea in mind, but ended up sealing up one of them with RTV sealant and only using the one hole.
Make sure the gasket is in place on your cable gland. Screw the gland in place on the jar and tighten the two halves together with a wrench or some pliers, but don't tighten the rounded end-nut yet. We'll tighten that once the air hose is in place.
Put your head image in the jar on the side opposite the cable gland, and secure it down to the bottom of the jar with some hot glue so it doesn't float up. Slip the air hose through the hole in the cable gland and leave enough room to reach the hole.
Tighten the nut on the cable gland. This will allow air to flow through the tube into the jar but not allow water to leak out around the tube.
Note: this image shows two cable glands but you only need one - the second hole ended up getting sealed up on my project.
If your lid has an airtight seal, drill a hole in the lid above the waterline. This will keep the additional air we're pumping in with our pump from pressurizing the jar and blowing the lid off.
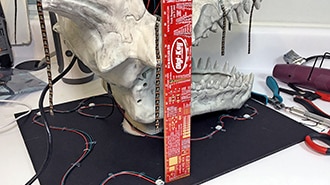
Cut a piece of EVA foam or similar material to create a base for the jar. The Circuit Playground Express and MOSFET get hot glued to the bottom of the jar with the Circuit Playground Express (CPX) right in the center. It needs to be directly in contact with the jar so that when you tap on the side of the jar the CPX is jiggled too.
Hot glue works great for this. I covered the NeoPixels on the CPX in hot glue then pressed it against the bottom of the jar. The hot glue still lets plenty of light through.
The EVA foam is thick enough that the CPX is not touching the table and will therefore be safer from leaks, and the jar sits comfortably on the foam instead of the controller.
Glue the end of the tube to the back of the image using RTV silicone sealant. I initially used hot glue, since it builds up nicely around the tube, but the smooth surface of the laminate kept the hot glue from sticking very well and the tube kept pulling off.
If you get glue over the front of the tube, re-poke the air holes with your pin.
Finish by adding some wig hair along the top of the head. I used hot glue to secure this along the top edge of the jar.
I wrapped the pump in some bubble wrap to dampen the noise a bit and placed it inside a box elsewhere on my curiosity shelf, to strengthen the illusion -- this pump is a bit loud. Be sure not to block the air intake hole on the pump when you're hiding it.
Fill the jar with water and place your creation prominently in your Cabinet of Curiosities.